
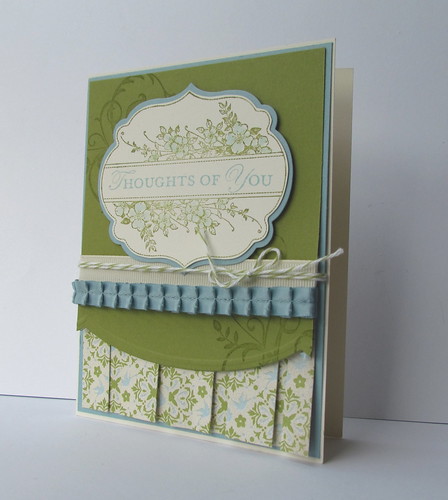
February Stamp Club Card
Box Pleat Technique
The Stamp Club tried out another new technique at the February workshop. I found a tutorial for the Box Pleat Technique on the Seeing Ink Spots blog. I did change the scoring dimensions to fit the card we made. These instructions are if you have a ScorPal as you have to move the paper each time. If you have the Stampin' Up Scoring Tool, you DO NOT need to move your paper strip!! Here goes... Score at 3-1/2 and 4-1/4, MOVE paper so score line is at 4" and score at 4-1/4 and 5, REPEAT until end of paper.
I found that I need to use some sticky strip on the pleats to keep them under control. I added the tape to the inside of the 1/4" fold and only to the top 1/3 of the card. That way the bottom of the pleats still pop open a bit.
When using the Edgelit Embossing Folders and Dies, I found that it is easier to emboss first and then line up the die to cut.
I stamped the Apothecary Art image in Classic Old Olive Ink. Then I coloured very carefully with an Aquapainter. (Squish the lid of the ink pad to so that ink pools on the inside lid. Pick up ink with the blender pen or aquapainter.) I find that when I use a blender pen or aquapainter with an image stamped in classic ink, the border of the image runs a bit. That is why I usually use StazOn ink. I don't have StazOn in Old Olive so I used Classic Old Olive and coloured very carefully trying not to touch the stamped image.
By the way, I cut out the frame of the stamped Apothecary Art image and then used the Label Framelit die in Baja Breeze to frame the image. I found I wanted a small edge of the border so I didn't use the framelit dies on either piece.
Hope that all makes sense. Let me know if you have any questions.
Supplies:
Stamps: Apothecary Art, Baroque Motifs, Loving Thoughts
Paper: Twitterpated DSP, Very Vanilla, Baja Breeze, Old Olive
Ink: Old Olive, Baja Breeze
Accessories: Pear Pizzaz Baker's Twine, Vanilla 5/8" Grosgrain Ribbon, Baja Breeze Pleated Ribbon, Adorning Accents Edgelits, Label Framelits, Adorning Accents Embossing Folder, ScorPal, AquaPainter, Sticky Tape


+of+IMG_8260.jpg)

