
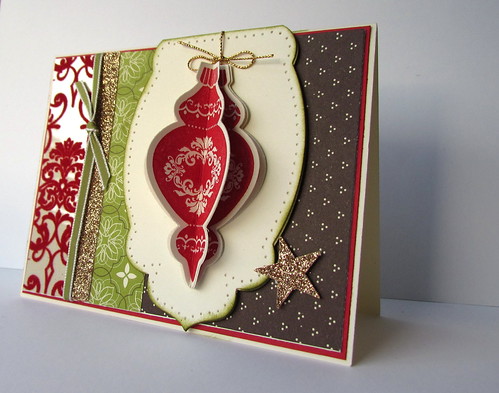
November Stamp Club Card
This card was inspired by one I was in the Holiday Mini Catalogue.
Directions:
Stamp
four ornaments and die cut with Ornament framelits. Complete using the Honeycomb Technique. as a guideline to make the above card.
Paper
pierce Apothecary Accent Die and sponge daub using Old Olive ink.
Adhere ornament to Apothecary Accent Die.
Add a
short piece of gold ribbon to the back of the ornament and the Apothecary Accent Die.
Tie a piece of gold ribbon in a bow and attach above the ornament with a rolled glue dot.
Add strips of Candlelight Designer Series paper and Champagne Glimmer Paper to Very Vanilla card stock.
Tie on Old Olive Ribbon. (At our stamp club, we used Real Red Ribbon instead.)
Adhere to Real Red card stock then the Very Vanilla card base.
Complete card by attaching Apothecary Accent piece and Glimmer star.
Dimensions:
Very Vanilla: scraps for ornament and Apothecary Accent, 4 x 5-1/4, 5-1/2 x 8-1/2
Real Red: 4-1/8 x 5- 3/8
DSP strips: various strip widths
Stamps: Ornament Keepsakes
Paper: Candlelight Christmas DSP, Champagne
Glimmer Paper, Real Red, Very Vanilla
Ink: Real Red, Old Olive
Accessories: Paper Piercing Pack Essentials, Paper
Piercer, Gold Ribbon (retired), Sponge Dauber, Dimensionals, Ornament Die, Star
Punch (retired), Old Olive Ribbon, Apothecary Accents Framelits, Glue Dots
Thanks for stopping by.


+of+IMG_8260.jpg)

