Thursday, December 15, 2011

Wintery Season of Friendship

Winter Season of Friendship by Andrea G71


December Stamp Club Card

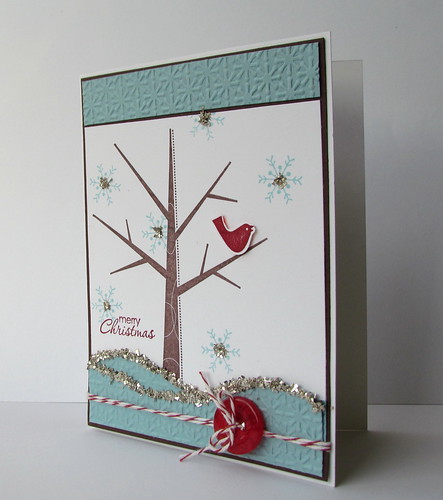
This is the second card we made at our Stamp Club last week.  It was not hard to make but took a little more time than the last card.  And of course it is using Baja Breeze....again.  Must be my new favourite colour.  

I find that the placement of the Cherry Cobbler accents (bird, sentiment and button) are a little off balance.  Next time I don't think I would have the bird and button on the same side of the card.  It needs to be in a more of a triangular placement (Is that even a term??).

Supplies:  

Stamps:  Season of Friendship, Petite Pairs
Paper:  Whisper White, Chocolate Chip, Baja Breeze
Ink::  Chocolate Chip, Baja Breeze, Cherry Cobbler
Accessories:  Brights Buttons, Baker's Twine, Glue Dot, Dimensional, Tombo White Glue, Silver Stampin' Glass Glitter, Snow Burst Embossing Folder, Big Shot

Directions:  

The main image uses basic stamping techniques: 
Stamp the tree trunk in Chocolate Chip and randomly stamp snowflakes in Baja Breeze.  Stamp the bird on a scrap of Whisper White in Cherry Cobbler and cut out.  Pop up on tree with a dimensional.

To make the Baja Breeze upper and lower borders:

I ran a piece of 4 x 5-1/4 Baja Breeze card stock through the Big Shot with the Snow Burst Embossing Folder.  Then I cut a 3/4" strip to be placed above the main image square.  Adhere it to the Chocolate Chip card stock.

Flip the Baja Breeze card stock upside-down so that the pattern is indented.  I created a template of "snowdrifts" on thin cardboard.  Place the template on the Baja Breeze cs and trace with a pencil.  Flip the template over and place further down on the Baja Breeze card stock.  Cut out first snowdrift.  Measure down from the highest drift and using cutter, cut at 1".  Repeat for second snowdrift.  (Hope that makes sense.)  Adhere on to Chocolate Chip card stock.  The snowdrifts should overlap onto the Whisper White cs/main image.

Add baker's twine and button.  Now adhere to card base.

Complete by adding white glue to the centers of the snowflakes and edges of the snowdrifts.  Sprinkle with Sliver Glass Glitter.

Dimensions:
Whisper White:  A2 Card Base, 4 x 4
Baja Breeze:  4 x 3/4, 4 x 1 (two)
Chocolate Chip:  4-1/8 x 5-3/8

Thanks for stopping by.

Sunday, December 11, 2011

Delicate Doilies for Winter

Delicate Doilies for Winter by Andrea G71


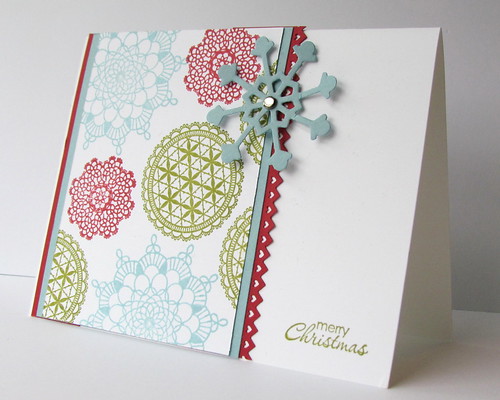
December Stamp Club  Card

Here is a very clean and simple card we made at out stamp club workshop.  I think it is fairly clear on how to make this card just by looking at the supply list.  So no directions today.  

Supplies:

Stamps:  Delicate Doilies, Petite Pairs
Paper:  Whisper White, Riding Hood Red, Baja Breeze
Ink:  Riding Hood Red, Baja Breeze, Old Olive
Accessories:  Pinking Hearts Border Punch, Glue Dot, Silver Brad, Snowflakes #2 sizzlet dies


Dimensions:

Whisper White:  A2 Card Base,  4-1/4 x 3-1/8 
Riding Hood Red:  4-1/4 x 1 strips (two)
Baja Breeze:  4-1/2 x 3-3/8, scrap for snowflake

That's all for now.  There will be one more card coming, so stay posted.

Thanks for stopping by.

Saturday, November 26, 2011

Merry and Bright

Merry and Bright by Andrea G71

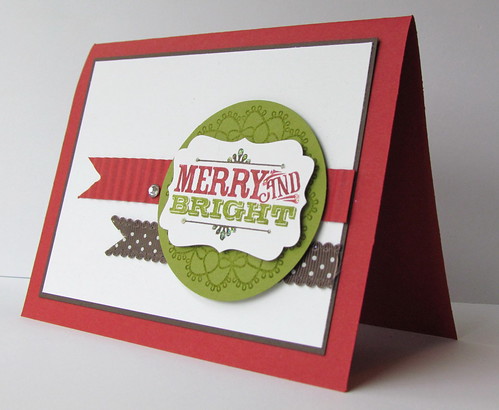
Another November Stamp Club Card:
Once again I got ideas off Splitcoaststampers.  HERE is the card I CASED.  I jumped at the chance to get out the Paper Crimper which has been lying dormant for many years!!  I bought it when I first started as a Demonstrator with Stampin' Up and actually never used it in a workshop.  I like the look of a corrugated strip.  

Supplies:

Stamps:  Delicate Doilies, Merry & Type
Paper:  Poppy Parade, Chocolate Chip, Whisper White, Old Olive
Ink:  Old Olive, Markers:  Poppy Parade, Old Olive, Chocolate Chip
Accessories:  Paper Crimper, Rhinestone, Chocolate Chip 1/2" Dotted Scalloped Ribbon, 2-1/2" Circle Punch, Glue Dots, Dimensionals, Dazzling Details

Nice and quick card.   Need to make those sometimes.

Thanks for stopping by.

Sunday, November 20, 2011

Snow Much Fun

Snow Much Fun by Andrea G71

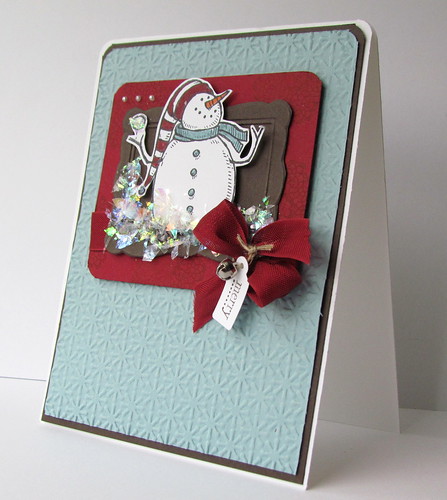
 November Stamp Club Card:

Once again I CASED a card off Splitcoaststampers.  Just not enough time to come up with entirely new ideas.  You can see that card HERE.

Supplies:

Stamps:  Snow Much Fun, Delicate Doilies, Tiny Tags
Paper:  Baja Breeze, Cherry Cobbler, Early Espresso, Whisper White
Ink:  Cherry Cobbler, Stazon Black, Early Espresso, Marker:  Tangerine Tango, Cherry Cobbler,  Baja Breeze
Accessories:  Snow Burst Embossing Folder, Designer Frames Embossing Folder, Cherry Cobbler Seam Binding, Pearls, Mini Jingle Bells, Mica Flakes, Linen Thread, Jewelry Tag Punch, Dimensionals, Glue Dots, Tombo Liquid White Glue, Corner Rounder Punch

I used this Technique to tie the bow. I've used this same bow tying technique in a card found on THIS post.

I think the card is fairly self explanitory just by looking at the photo and the supply list.  If you have questions, please feel free to leave a comment and I will answer it either in this post or in the comment section.

Thanks for stopping by.


Saturday, November 12, 2011

Fall Foliage

Fall Foliage by Andrea G71 

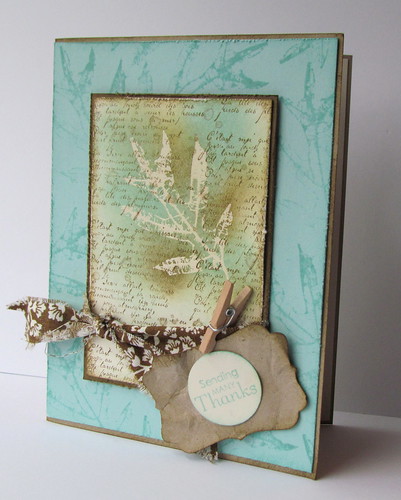
Another card for the Stamp Club.....
 This card was inspired by THIS card on Splitcoaststampers.  Changed a few things but looks pretty much the same.  The one thing I love about this card is that instead of ribbon, a strip of designer fabric is used instead.  Ingenious!  

 Dimensions:

Crumb Cake:  A2 Card Base; Scrap for labe
Pool Party:  5-3/8 x 4-1/8
Soft Suede:  2-3/4 x 4
Very Vanilla: 2-5/8 x 3-7/8; scrap for circle

Instructions:  
Punch Label and crumple to distress.  Sponge edges with Soft Suede ink.  Stamp sentiment in Pool Party ink and punch out with circle punch.

Stamp Oak leaves on Pool Party card stock with Pool Party ink.  Sponge edges with Pool Party ink and gently distress with edge distresser.

Distress and sponge edges of Soft Suede card stock.

Main Image:
Stamp "french script" with Soft Suede ink randomly over Very Vanilla card stock.
Randomly stamp "droplets" on same card stock.
Rub card stock with embossing buddy to get rid of static.  Stamp Oak Leaf with Versa Mark ink and sprinkle with Clear Embossing Powder. Heat.
Sponge randomly over leaf area with Soft Suede and Pool Party ink.
Distress edges and sponge with Soft Suede ink.

Adhere all pieces together and attach embellishments.

Supplies:

Stamps:  French Foliage, Petite Pairs
Paper:  Crumb Cake, Pool Party, Very Vanilla, Soft Suede
Ink:  Soft Suede, Crumb Cake, Pool Party, VersaMark
Accessories:  Clear embossing powder, Heat Gun, Sponges, Mini Clothes Pin, Glue Dots, Designer Fabric, Edge Distresser, 1" Circle Punch, Label Punch, Embossing Buddy.

A view of the inside of the card.
Thanks for stopping by.


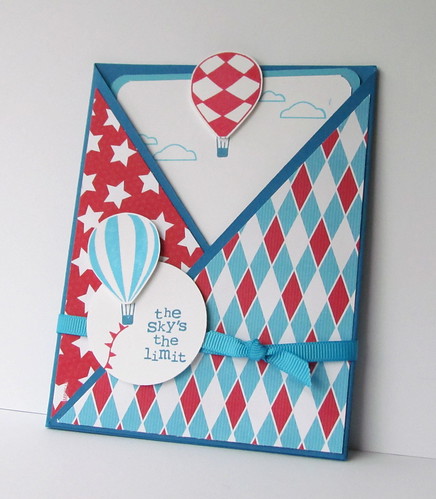
Up and Away

Up and Away Crisscross Card by Andrea G71 

Finally!!  This is the card we made at the October stamp club workshop!!  Whaaat?!?  But it is half-way through November.  I know, I know.  This job thing is getting in the way of stamping and blogging.  Anyway, here are a few details:

Instructions to make a Criss Cross Card can be found on Splitcoaststampers HERE.  To make this type of card vertical, scroll down to the bottom of the post and dimensions and instructions will be given there. (Of course I messed up my cutting for the workshop and measured and cut the card stock for the horizontal card.  Sorry about that!!)


Dimensions: 

See Tutorial HERE


Supplies:

Stamps:  Up, Up and Away
Paper:  Pacific Point, Whisper  White, Tempting Turquoise, Big Top Birthday DSP
Ink:  Real Red, Tempting Turquiose, Pacific Point
Accessories:  Tempting Turquiose 1/4" Grosgrain Ribbon, Dimensionals, Sticky Tape, 1-3/4" Circle Punch


Another post will be coming soon!  Thanks for stopping by.

Sunday, October 2, 2011

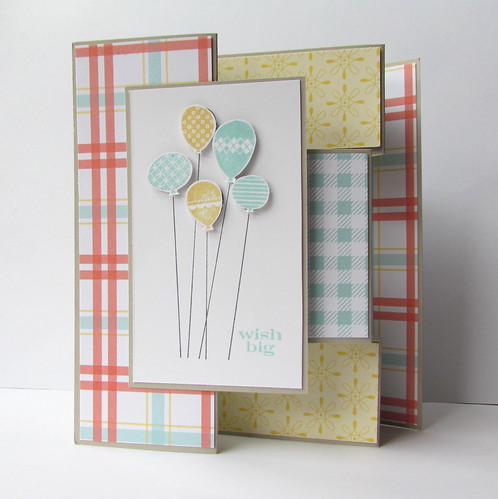
Tri-Shutter Card

Patterned Party Tri Shutter Card


Another card we made at the September stamp club workshop was a Tri-Shutter card.  I was a little indimidated by this style of card.  But after following a great TUTORIAL on Splitcoaststampers I found that it really wasn't too hard to make.

After cutting the 5-1/2 x 12 card stock to make the tri-shutter folds, the rest was very easy to put together.  
Stamping was done only on the main image panel. By the way, add adhesive to only ONE side of the main image panel.  Otherwise your card will stick shut.  This has happened to me many times!!

Also, I would have liked to have coloured the balloons with markers right on the stamp, but I don't have the Pool Party Marker.  So stamped the balloons on scrap card stock in So Saffron and Pool Party ink and then cut them out.  Not to quick!

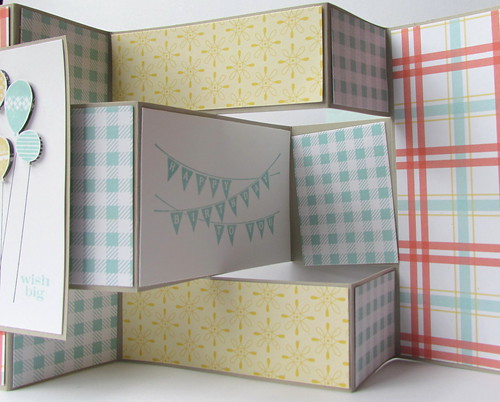
Inside of Tri-Shutter Card
View of the inside....and a piece of DSP falling off.  Ooops.

Supplies:

Stamps:  Patterned party, Pennant Parade (sentiment)
Paper:  Domestic Goddess DSP, Sahara Sand, Whisper White
Ink:  Pool Party, So Saffron, Basic Grey
Accessories:  Dimensionals

Dimensions of DSP:

5-3/8 x 1-7/8  (2)  Large Plaid Design
1-7/8 x 1-3/8  (4)  Pool Party Checks Design
1-7/8 x 2-3/8  (2)  Pool Party Checks Design
1-3/8 x 3-7/8  (2)  Yellow Design

Other Dimensions:

Sahara Sand:  5-1/2 x 12, 2-3/8 x 4
Whisper White:  2-1/4 x 3-7/8, 2-3/8 x 3-7/8

Thanks for stopping by.
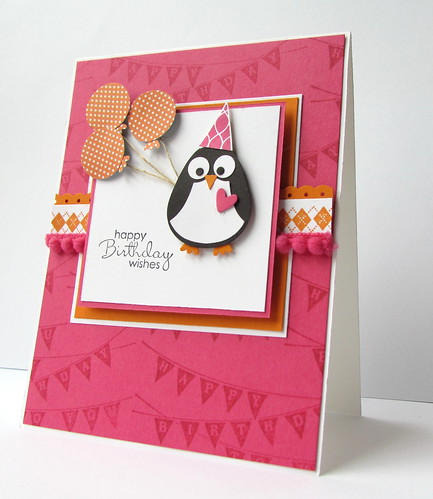
Penguin Punch Art

Punch Art Penguin and Patterned Party

One of my stamp clubs began meeting again in September after a summer break.  It was great to get together and stamp.  This is one of the cards we made.  I saw THIS card on  Splitcoaststampers by Renee.  She also has a blog,  Stamping for Sanity,  that has wonderful cards.  I thought this card would be a fun one to use with the club.

I guess I would have to say that the trickiest thing about this card is putting the penguin and balloons together.  It's not hard but is time consuming to glue all the little pieces together.   There are three punches I used to create the main image:  3/4" Circle Punch (balloons), Pennant Punch (hat), and the Owl Punch.  I took a photo of all the pieces that need to be punched out.  Sorry that it is not a very clear picture. 


Another thing to note about this card is that I popped up the Melon Mango and Whisper White square with double dimensionals so it could fit over the Melon Mango Pompoms nicely.  It had a warped look when I didn't do that.  

I think everything else is self-explanitory by looking at the card and supply list. 

Supplies:

Stamps:  Pennant Parade, Patterned Party, Petite Pairs
Paper:  DSP (retired),  Whisper White, Basic Black, Pumpkin Pie, Melon Mango
Ink:  Melon Mango, Pumpkin Pie, Black Stazon
Accessories:  Melon Mango Pompom Ribbon (retired), Dotted Scalloped Border Punch, 3/4" Circle Punch, Owl Punch, Pennant Punch, Dimensionals, Two-Way Glue Pen, White Glue, 

Dimensions:

Whisper White:  4-1/4 x 11 card base, 2-5/8 x 2-5/8, 3-1/8 x 3-1/8, 1/2 x 4-1/8
Melon Mango:  4-1/8 x 5-3/8, 2-3/4 x 2-3/4
Pumpkin Pie:  3 x 3, 4-1/8 strip for scallop border
Scraps in Basic Black, Whisper White, Pumpkin Pie, DSP, Melon Mango for Punch Art.


Thanks for stopping by.
Friday, August 5, 2011

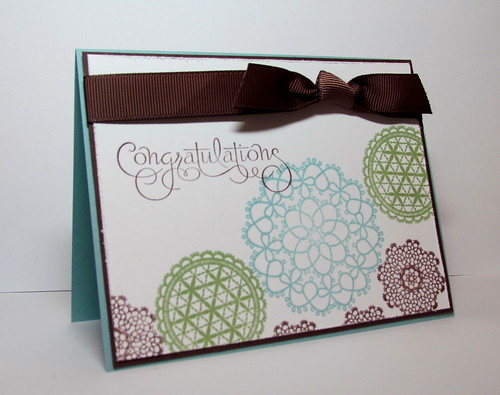
Delicate Doilies

Delicate Doilies by Andrea G71


Delicate Doilies is another new set from the new Stampin' Up Catalogue.  I really like this set but I debated in getting it because I think it might be challenging to come up with different ideas on how to use it.  It is a set that I would not normally choose.  Maybe that is why I am having difficulties thinking of creative ways to use it.  It is good to have challenges and have to think outside the box, right?

Supplies:

Stamps:  Delicate Doilies, Well Scripted (retired)
Paper:  Baja Breeze, Chocolate Chip, Whisper White
Ink:  Baja Breeze, Wild Wasabi, Chocolate Chip
Accessories:  5/8" Chocolate Chip Grosgrain Ribbon, Edge Distresser

Thanks for stopping by.

Friday, July 29, 2011

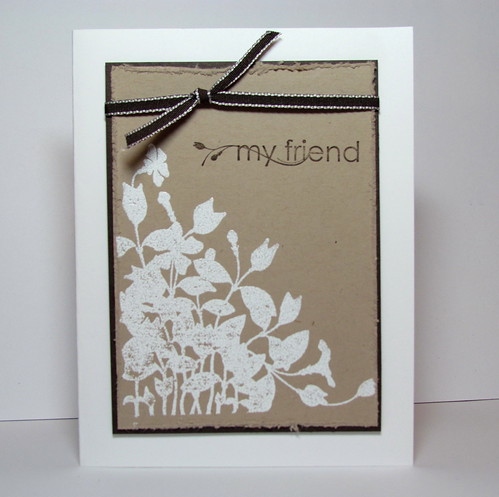
My Friend

My Friend by Andrea G71

Here is another set, My Friend, that I just had to get from the new 2011-2012 Idea Book and Catalogue.   There are soooo many sets that I just had to get but I still limited myself.  LOL.  I am having a great time trying them all out.  Unfortunately there just isn't enough time in the day.  And of course I don't want to neglect my children.  ;)

Supplies:

Stamps:  My Friend
Paper:  Whisper White, Early Espresso, Crumb Cake
Ink:  Craft Whisper White, Early Espresso
Accessories:  White Embossing Powder, Edge Distresser, Early Espresso 1/8" Taffeta Ribbon, Dimensionals

Thanks for stopping by.
Friday, July 22, 2011

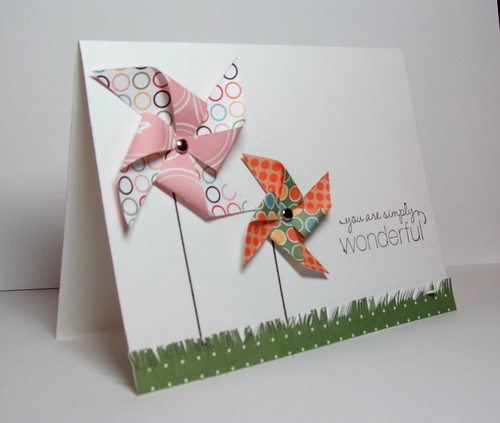
Wonderful Pinwheels

Wonderful Pinwheels by Andrea G71

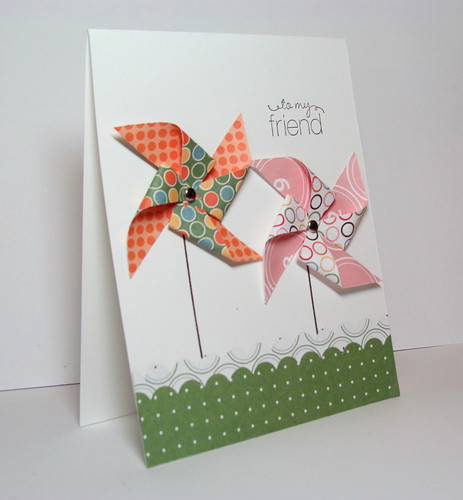
You may have noticed that pinwheels seem to be all the rage right now.  Stampin' Up has a new stamp set in the current and NEW catalogue that have a variety of pinwheels ~ Sweet for the Sweets set.  I have also seen a number of cards out there with actual pinwheels on them.  I thought that was such a cute idea and when I saw THIS CARD I decided I need to try making them for myself.  I had never made a pinwheel before, or at least not since I was a child, so I had to go on you tube to find instructions.

There are a couple of details you might like to know about this card....

The square size of the pinwheels is 2" x 2".  As you can see that makes them quite large.  The card that I CASED had smaller pinwheels.

To make the pinwheel "sticks" or holders, I used the birdcage stand from the Aviary stamp set.  Just make sure the "legs" of the stand don't show up on your card.

To make the pinwheel I found that I couldn't hold down the inner points with my fingers very easily.  So what I did was place my paper on the foam of the Mat Pack, fold in a corner and hold it down with my paper piercer.  And keep doing that with all four corners.  When they are all in place, just press firmly to make a hole through all corners and poke piercer all the way through.  Now add your brad through the hole.  Viola!  And there's your pinwheel.

Supplies:

Stamps:  Friendly Phrases, Aviary
Paper:  Whisper White, Just Add Cake DSP
Ink:  Early Espresso
Accessories:  Silver Brads, Paper Piercer, Mat Pack, Scalloped Border Punch, Dimensional

Thanks for stopping by.

Pinwheels

IMG_0767 by Andrea G71

My boys have been at a summer day camp all week.    Today is the last day.  :(  I have been able to get lots done this week:  errands, shopping, a pedicure and lunch out with friends, finished the book called The Help, house cleaning and STAMPING to list a few things that have kept me busy.   So I hope to post a little more regularly in the next month.  But no promises.  :) 

The pinwheels measure at 2 x 2 and 1.5 x 1.5.  You can see more details regarding the pinwheel cards in the next post.

Supplies:

Stamps:  Friendly Phrases, Aviary
Paper:  Whisper White, Just Add Cake DSP
Ink:  Early Espresso
Accessories:   Silver Brad, Paper Piercer, Mat Pack, Paper Snips, Dimensionals

Thanks for stopping by.

Monday, June 27, 2011

Pure Bliss

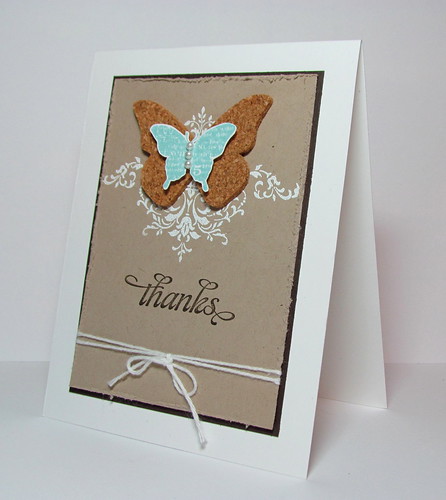
Pure Bliss by Andrea G71

The end of the school year has arrived.  My boys will be ending school this week.  So last week I worked on teacher gifts.  I have made a set of cards for each of them and will be giving a gift certificate for McNally Robinson Books as well.  This is one of the cards in the card set of five.  I find the photo doesn't do it justice.  IN REAL LIFE, the cork matches much better to the Crumb Cake card stock and the butterfly is Baja Breeze.  Here it looks almost like Pool Party, one of the new In Colors.   Oh well.  Still learning to take proper photos.  :(

Supplies:
Stamps:  Bliss (SAB 2011), Thank You Kindly (retired)
Paper:  Whisper White, Early Espresso, Crumb Cake
Ink:  Whisper White Craft, Baja Breeze, Early Espresso
Accessories:  White Embossing Powder, Pearls, Dimensionals, Cork, Beautiful Butterflies Bigz Die, Big Shot, White Bakers Twine, Distresser, Stamp-a-ma-jig

I haven't decided which set I will be giving to whom.  Maybe I'll let the boys decide.  You can find a card almost identical to Card Set #1 HERE.  

Card Set #1

Card Set #2


Thanks for stopping by.


Friday, June 24, 2011

Go Confidently

Go Confidently by Andrea G71

 
 Fall to Layout 146 and Colour Q Challenge #90

I must have been on a roll today because I was able to meet the requirements for two sketch challenges:  the Fall to Layout 146 on the Clean and Simple Blog and the Colour Q Challenge #90 on the Colour Q Blog.  This does not usually happen for me!!  But today it worked out for some reason.  I did make a change to the colour challenge though.  I don't have Poppy Parade or Brilliant Blue so I used Riding Hood Red and Pacific Point instead.  Hope that is OK. :)

Supplies:  
Stamps:  Word Play, A to Z, Dot Dot Dot
Paper:  Whisper White, Riding Hood Red, Tempting Turquoise, Pacific Point, Bashful Blue
Ink:  Pacific Point, Riding Hood Red, Tempting Turquoise, Markers: Riding Hood Red, Tempting Turquoise, Pacific Point
Accessories:  Small Star Punch, Large Star Punch,  Dimensionals, Paper Piercer, Mat Pack

As I said, I was on a roll so I made another card using the FTL146.  As you can see it has a completely different look to it.  I embossed the bold flower stamp from Fabulous Florets in white embossing powder on Paisley Petals DSP (coming soon in the 2011-12 IB&C).

Supplies:

Stamps:  Engraved Greetings (retired), Fabulous Florets
Paper:  Whisper White, Tangerine Tango, Paisley Petals DSP
Ink:  VersaMark, Pear Pizzaz Marker, Tangerine Tango Marker
Accessories:  Dimensionals

On a final note, here are a couple of cards that were sent to me from some of my Stampin' Up customers.  Thanks so much.  They are gorgeous!!

Meghan M.
Pauline M.
Thanks for stopping by.

Monday, June 20, 2011

Fabulous in Black

Fabulous in Black by Andrea G71


 I was inspired by THIS card on Splitcoaststampers.  I thought that these colours of embossing powder were very striking against the black card stock.  Had to try it too.

Supplies:
Stamps:  Fabulous  Florets, Teeny Tiny Wishes
Paper:  Whisper White, Basic Black, Wild Wasabi
Ink:  VersaMark, Wild Wasabi
Accessories:  Wild Wasabi, Melon Mambo and Tangerine Tango Embossing Powder, Dimensionals

Thanks for stopping by.

Friday, June 17, 2011

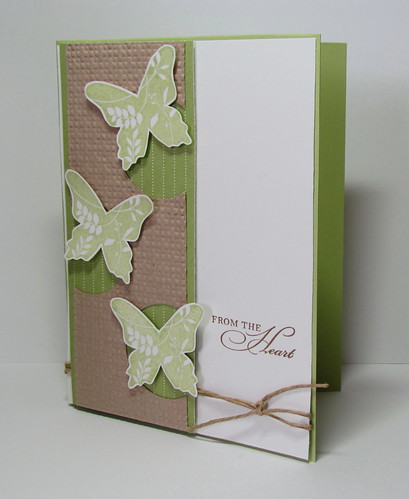
To a Great Friend ~ From the Heart

To a Great Friend ~ From the Heart by Andrea G71


 I made this card a loooong time ago.  I got the idea of placing a stamped image inside the punched our circles from somewhere!?!? Can't figure out from which blog I got it from!  I do remember the card I looked at had stars instead of butterflies.

Supplies:
Stamps:  Great Friend, Watercolor Trio (sentiment)
Paper:  Whisper White, Certainly Celery, Certainly Celery DSP, Crumb Cake
Ink:  Soft Suede, Certainly Celery
Accessories:  Hemp Twine, 1-1/4" Circle Punch. Square Lattice Embossing Folder, 

I am currently having contest with my Stampin' Up! customers.  One of the options they have to enter the draw is to send me a hand stamped card that they have made.  Here are a few cards that were sent to me.....I mean dropped off in my mailbox and emailed since Canada is  currently in the midst of a postal strike.  Aren't they lovely!

Brenda H.

Wilma F.
Wilma F.  
 Thanks for the cards!   I hope to add more soon.
Thanks for stopping by.

Friday, June 10, 2011

Fabulous Floret

Fabulous Floret by Andrea G71

 June Stamp Club Card

Faux Metal Technique

Directions:

Round corners of various pieces of card stock.  Note that not all corners have been rounded.

Stamp the line-art flower in Tangerine Tango ink on the Whisper White card stock. 

Stamp the Wood Grain stamp on the Early Espresso card stock with Early Espresso ink.
Adhere stamped pieces to the Tangerine Tango card stock.

Use Early Espresso Bakers' Twine to tie a bow. 


To create the Tangerine Tango main image you will need your stamp, smallest piece of Whisper White card stock, VersaMark, Tangerine Tango Embossing Powder and a Heat Gun.

Follow THIS TUTORIAL on Splitcoaststampers to create the Faux Medallion Technique.  (If you use silver, gold or bronze embossing powder it will create the true Faux Metal look.)

Once "medallion" is complete, adhere to Whisper White and Early Espresso card stock squares.  Add dimensionals on the back and complete card.

TIP #1:  When embossing the "medallion", you can either add more embossing powder immediately after heating.  Or you can wait until medallion has cooled and then ink up again with more VersaMark.  Make sure the embossing powder has cooled otherwise the ink pad will get messed up.

TIP #2:  If you don't like how your stamped image turned out in the melted embossing powder, ink up with VersaMark, add more embossing powder and reheat until smooth again.

Dimensions:
Whisper White:  4-1/4 x 5x5 card base,  3-1/4 x 2-1/2,  1-7/8 x 1-7/8;  1-3/4 x 1-3/4

Early Espresso:  3-1/4 x 1-1/2,  2 x 2

Tangerine Tango:  3-3/8 x 2-5/8

Supplies:


Stamps:  Fabulous Florets, Wood Grain
Paper:  Whisper White, Tangerine Tango, Early Espresso
Ink:  VersaMark, Tangerine Tango, Early Espresso
Accessories:  Tangerine Tango Embossing Powder, Heat Gun, Dimensionals, Early Espresso Bakers Twine, Corner Rounder

Thanks for stopping by.
Thursday, June 9, 2011

Father's Day Card

Father's Day Shirt Fold Card by Andrea G71

 June Stamp Club Card

Shirt Fold Technique

At our June Stamp Club we tried out new products from the Summer Mini Catalogue.  This was a very simple card to make with the most difficult thing being the shirt. I found a blog, Stamp a Little Love, that had a great tutorial the Shirt Fold Technique.   CLICK HERE to learn how to make these shirts.   

A couple of other details:

The ties are stamped in VersaMark on Crumb Cake card stock.

The tie on the shirt is stamped in Early Espresso ink on a scrap of Whisper White card stock, cut out and glued or taped down.

The Early Espresso card stock is embossed with the Square Lattice embossing folder.

See?!?! Fairly simple card to make.

Dimensions:  

Whisper White:  4-1/4 x 5-1/2 card base; scrap for tie
Old Olive:  4-1/8 x 5-3/8;  4 x 2-3/8
Early Espresso:  4 x 5-1/4
Crumb Cake:  4 x 2-1/8
Old Olive DSP:  4 x 6
Supplies:
Stamps:  Best Dad Ever
Paper:  Whisper White, Old Olive, Early Espresso, Crumb Cake, Old Olive DSP
Ink:  VersaMark, Early Espresso
Accessories:  Scor-Pal, Bone Folder, Big Shot, Square Lattice Embossing Folder

Thanks for stopping by.
Wednesday, May 25, 2011

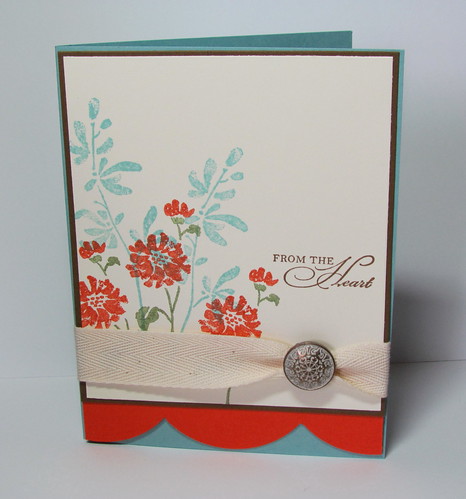
From the Heart

From the Heart by Andrea G71

 I pulled out an old favourite for this card - the retired Watercolour Trio stamp set.  This is one of those sets that I will never get rid of.   I also pulled out some twill tape that has been sitting around forever.  I don't use it very often but I should since it is so nice to work with.

Supplies:

Stamps:  Watercolor Trio
Paper:  Baja Breeze, Tangerine Tango, Soft Suede, Very Vanilla
Ink:  Baja Breeze ink, Soft Suede ink, Tangerine Tango and Pear Pizzaz Markers
Accessories:  Vintage Brads, Twill, Embossed Curve Border Punch (non-SU), 

Thanks for stopping by.