Sunday, April 29, 2012

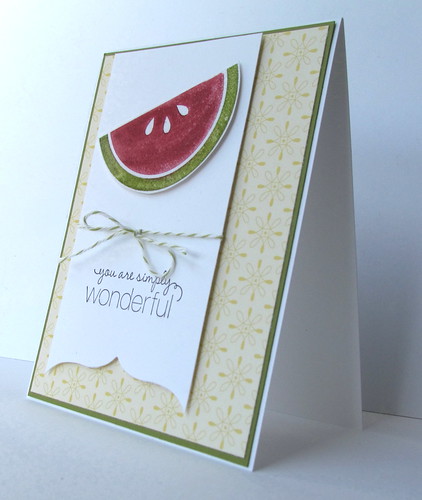
Mouthwatering

IMG_1317 by Andrea G71


April Stamp Club Card

I am pretty sure I found this layout on the lime doodle blog.  She has some really nice clean and simple cards.  Easy to CASE exactly or step it up a notch with more layers. 

As you can obviously see, I used the watermelon image from the Mouthwatering stamp set.  Unfortunately you cannot smell the watermelon scent of the embossing powder.  The ironic thing is that I do not like watermelon or the real or fake scent and flavour of this fruit.  But for some strange reason I just had to buy the e.p. so I could use it with this stamp.  So, even though I don't eat watermelon, I really like the look of this card.  :)

Here are the deets....

Embossing Watermelon image:

Colour stamp using Riding Hood Red and Old Olive Marker.  Stamp on Whisper White scrap card stock.  


Tip:  Use the 2-1/2" Circle Punch to punch out watermelon. (Or you can just use scissors to cut it out.  :)  )  Then use scissors to cut straight edge of watermelon.


Place stamped image directly on Versamark ink pad and gently tap so that entire piece gets covered with Versamark ink.  


Cover with embossing powder (Watermelon Scented used here) and heat.  


There seems to be a lot of cards out there with a banner on the card.  If the banner is not too wide, you can always use your square punch to make the bottom edge into the two flags or points.  This card stock was wider and I didn't want to measure where the center of the card was and then have to cut it out.  So I used a label framelit to cut off the bottom edge of the card stock.

 Banner Tag using a Framelit Die


All you need to do is place your card stock on your Big Shot and place the top edge of the Labels framelit on the bottom edge of the card stock.  Make sure it lines up evenly and then run it through.

Supplies:

Stamps:  Mouthwatering (2012 Occasions Mini), Friendly Phrases
Paper:  Whisper White, Old Olive, Domestic Goddess DSP
Ink:  Basic Black, Riding Hood Red Marker, Old Olive Marker, Versamark
Accessories:  Lucky Limeade Baker's Twine, Dimensionals, Watermelon Scented Embossing Powder, Heat Gun, 2 1/2" Circle Punch, Labels Framelits, BigShot

Dimensions:

Whisper White:  A2 card base, 2-3/4 x 5-1/4 (trim after using framelit die), scrap (for watermelon)
Old Olive:  5-3/8 x 4-1/8
DSP:  5-1/4 x 4


Thanks for stopping by.

 

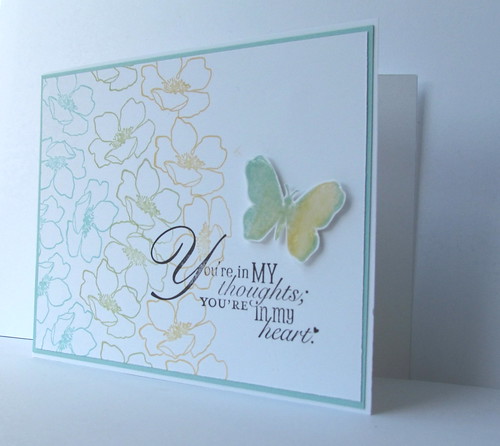
Butterflies are Fabulous

IMG_1319 by Andrea G71


April Stamp Club Card

As time goes by, I find myself more and more drawn to butterflies.  I seem to have quite a few stamp sets with butterfly images.  I've even filled a picture frame of butterflies using the Beautiful Wings embosslit.  It looks something like THIS but with a dark brown frame.  And above it, I have a wrought iron butterfly.   So here is a card using a butterfly.  What is hard to see in the photo is the Crystal Effects covering the entire butterfly image.

Butterfly using Rock and Roll Technique with a Twist:

Stamp one half of the butter fly in So Saffron ink.  Stamp the other side of the butterfly in Certainly Celery ink.  Roll butterfly stamp around the edges of the stamp in Pool Party ink.  Stamp on card stock.   


Tip:  Apply Crystal Effects over the entire butterfly image.  Make sure you do this once the card has been completed and assembled.  Or you will have to wait many hours until the Crystal Effects dries before adhering it to the card.

Supplies:

Stamps:  Fabulous Florets, Word Play
Paper:  Whisper White, Pool Party
Ink:  Pool Party, Certainly Celery, So Saffron, Basic Black
Accessories:  Dimensionals, Crystal Effects 


Thanks for stopping by.


Friday, March 30, 2012

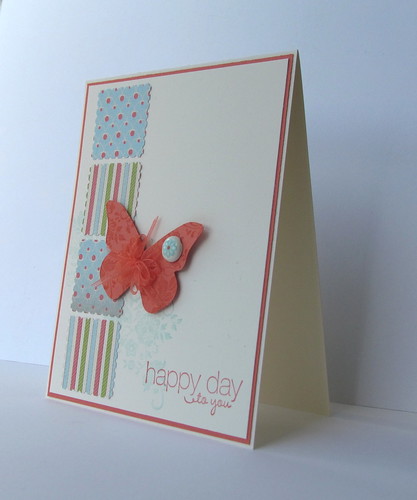
Cameo Coral Butterfly

Cameo Coral Butterfly by Andrea G71

The Stamp Club workshop was a small group this month.  As a result,  we definitely had time to make three cards.  Yay!  This is a quick card we made at the end of the evening.  As you can see, it uses the Postage Stamp Punch and the Fresh Vintage SAB set.  One last chance to use this set before Sale-a-bration is done for the year.  :(

Take a look at the fancy ribbon at the center of the butterfly.  I was browsing around YouTube looking for ribbon bow tie ideas and came across THIS TUTORIAL.  Try it out! It is actually fairly simple.

Supplies:

Stamps:  Fresh Vintage (SAB 2012), Friendly Phrases
Paper:  Very Vanilla, Calypso Coral, Everyday Enchantment DSP (SAB 2012),
Ink: Pool Party, Calypso Coral
Accessories:  Calypso Coral Everyday Enchantment Organdy Ribbon (SAB 2012), Glue Dot, Dimensionals, Everyday Enchantment Brad (SAB 2012), Postage Punch

Thanks for stopping by.

Monday, March 26, 2012

Wisteria Wonder

Wisteria Wonder by Andrea G71


March Stamp Club Card

In the last year or so, you can see doilies everywhere.  From cards to home decor.  Stampin' Up has even gotten in on the fad.  Not only does it have a stamp set that features the doily look in Delicate Doilies.  But it also has its very own Sizzlet die.  You can see the use of both on this card.
  
Once again, CASEd someone else's card.  You can see where I got my inspiration from HERE.

It is a fairly basic card to make just by looking at the photo and the supply list.

TIP:  When using the Sizzlet Large Paper Doily, create an extra shim to add to your Big Shot sandwich.  I found a thin piece of card board and cut it to the same size as the Big Shot cutting pads.  I placed the sandwich in this order:  Multipurpose Platform (at Tab 1), Cardboard Shim, Cutting Pad, Sizzlet Doily, Cutting Pad.  It felt quite stiff when turning the handle but that is OK.  

Use a paper piercer to poke out the pieces of the doily.  I found that when I added the extra shim, it took less time to poke out the pieces and many of them fell out as I took the doily off of the die. 

Supplies:

Stamps:  Delicate Doilies, Petite Pairs
Paper:  Flirtatious Specialty DSP, Wisteria Wonder, Whisper White
Ink:  Craft White, Wisteria Wonder
Accessories:  Sizzlet Large Paper Doily, Paper Piercer, Big Scallop Circle (non-SU), 2-1/2 Circle Punch, Bigz Butterfly Die, Wisteria Wonder Ribbon, Dimensionals, Large Pearl


Dimensions:


Whisper White:  5-1/2 x 8-1/2, 4-1/4 x 4-1/4 (for doily), piece for 2-1/2 circle
Wisteria Wonder:  5-3/8 x 4-1/8, 3-1/4 x 3-1/4 (for scalloped circle), 2 x 2-1/2 (for butterfly)
DSP:  4 x 5-1/4

Thanks for stopping by.

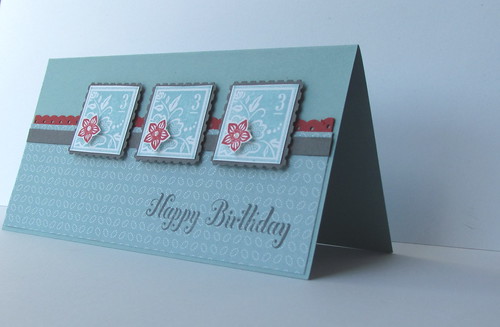
Vintage Postage Stamps

Vintage Postage Stamps by Andrea G71


March Stamp Club Card

Here is one of the cards we made at the March Stamp Club.  It's simple but has the "wow" factor.  Maybe it's because of the Baja Breeze.  Love that colour!  Here are the deets.....

Supplies: 

Stamps:  Fresh Vintage (SAB 2012), Bring On the Cake
Paper:  Baja Breeze, Basic Grey, Riding Hood Red,  Whisper White, Twitterpated DSP
Ink:  Baja Breeze, Basic Grey, Riding Hood Red
Accessories:  Postage Punch, Dazzling Details, Smooch Pearlized Top Coat, Dimensionals, Two- Way Glue Pen, Dotted Scallop Border Punch 

A couple of details to take note of:

I used Dazzling Details in the center of the Riding Hood Red Flower.  Smooch Pearlized Top Coat was used to colour in the petals.


Stamp the postage stamp image in Baja Breeze on Whisper White card stock.  Cut out with scissors.  Adhere to Basic Grey Postage Stamp punch outs.  I had been holding off on buying this punch, but now I am so glad I did!  Love it.  It adds that little bit of extra specialness to layering an image.  

I used dimensionals to pop up the three postage stamps and the red flowers.


You can find the sample I CASEd HERE.   Isn't that a lovely card?!?  I am very sad to say that I cannot take credit.  I like to blame it on my part time job.  LOL.  Just don't have as much time to come up with my own ideas anymore. 


Dimensions:

Baja Breeze:  6 x 6
Basic Grey:  5-7/8 x 1/4, scraps for postage punch
Whisper White:  scraps for flower and postage stamp image
Riding Hood Red:  5-7/8 strip for scalloped border
DSP:  5-7/8 x 1-3/4


3 x 6 card

Thanks for stopping by.

Sunday, February 19, 2012

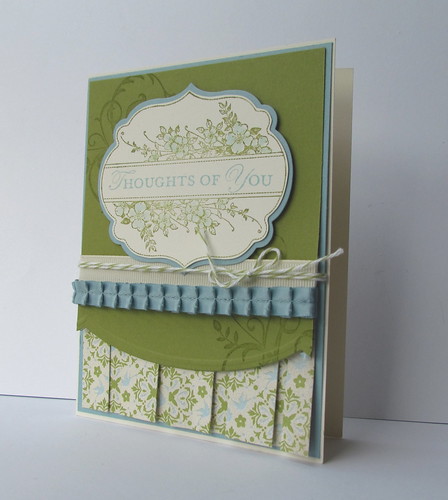
Box Pleated Apothecary Art

Box Pleated Apothecary Art by Andrea G71


February Stamp Club Card
Box Pleat Technique

The Stamp Club tried out another new technique at the February workshop.  I found a tutorial for the Box Pleat Technique on the Seeing Ink Spots blog.  I did change the scoring dimensions to fit the card we made.  These instructions are if you have a ScorPal as you have to move the paper each time.  If you have the Stampin' Up Scoring Tool, you DO NOT need to move your paper strip!! Here goes... Score at 3-1/2 and 4-1/4, MOVE paper so score line is at 4" and score at 4-1/4 and 5, REPEAT until end of paper.


I found that I need to use some sticky strip on the pleats to keep them under control.  I added the tape to the inside of the 1/4" fold and only to the top 1/3 of the card.  That way the bottom of the pleats still pop open a bit.


When using the Edgelit Embossing Folders and Dies, I found that it is easier to emboss first and then line up the die to cut.


I stamped the Apothecary Art image in Classic Old Olive Ink.  Then I coloured very carefully with an Aquapainter.  (Squish the lid of the ink pad to so that ink pools on the inside lid.  Pick up ink with the blender pen or aquapainter.)  I find that when I use a blender pen or aquapainter with an image stamped in classic ink, the border of the image runs a bit.  That is why I usually use StazOn ink.  I don't have StazOn in Old Olive so I used Classic Old Olive and coloured very carefully trying not to touch the stamped image.  


By the way, I cut out the frame of the stamped Apothecary Art image and then used the Label Framelit die in Baja Breeze to frame the image.  I found I wanted a small edge of the border so I didn't use the framelit dies on either piece.


Hope that all makes sense.  Let me know if you have any questions.
 
Supplies:

Stamps:  Apothecary Art, Baroque Motifs, Loving Thoughts
Paper: Twitterpated DSP, Very Vanilla, Baja Breeze, Old Olive
Ink:  Old Olive, Baja Breeze 
Accessories: Pear Pizzaz Baker's Twine, Vanilla 5/8" Grosgrain Ribbon, Baja Breeze Pleated Ribbon, Adorning Accents Edgelits, Label Framelits, Adorning Accents Embossing Folder, ScorPal, AquaPainter, Sticky Tape  
Thanks for stopping by.

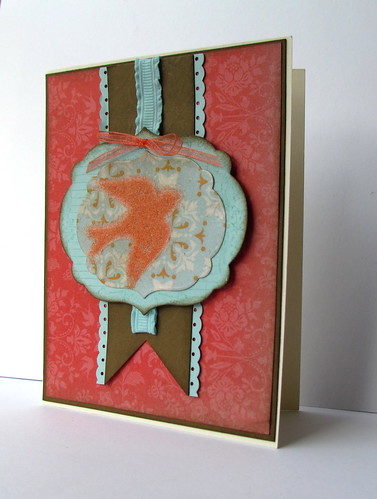
Notably Enchanted

Notably Enchanted by Andrea G71


 February Stamp Club Card
Embossed Image Technique

Last week, the Stamp Club got together at Meghan's for our monthly workshop.  We tried a new technique on this card.  It's kind of fun and I think it works really well with the bird from the Notable Ornate stamp set.  Here are a few directions on how I went about making the card:

To use the Embossed Image Technique, I followed THIS TUTORIAL on Splitcoaststampers.  I did not stamp the background of the card stock, but used patterned paper instead (Everyday Enchantment DSP). 


The larger Label Framelit is stamped in Pool Party ink on Pool Party  card stock with the "ornate" stamp from the Notably Ornate stamp set.  


All edges are lightly sponged with a sponge dauber in Soft Suede ink.


It is hard to see in the photo, but the long pennant strip of Soft Suede card stock is Embossed with the swirly side of the Perfect Details Texturz Plate.


I tied the Calypso Coral Ribbon into a bow and adhered it to the card with a glue dot.  I found that I needed to "roll" the dot into a cylinder so that the dot would not show.  


Supplies:

Stamps:  Notably Ornate
Paper:  Everyday Enchantment DSP (SAB 2012), Very Vanilla, Pool Party, Soft Suede
Ink:  Soft Suede, Pool Party, VersaMark
Accessories:  Label Framelits, Perfect Details Texturz  Plate (on Soft Suede tag), Scalloped Dotted Ribbon Border Punch, Sponge Dauber, Dimensionals, Glue Dot, Everyday  Enchantment Calypso Coral Ribbon (SAB),  Pool Party Ribbon, Clear Embossing Powder, Tangerine Tango Embossing Powder

Thanks for stopping by.