Tuesday, December 31, 2013

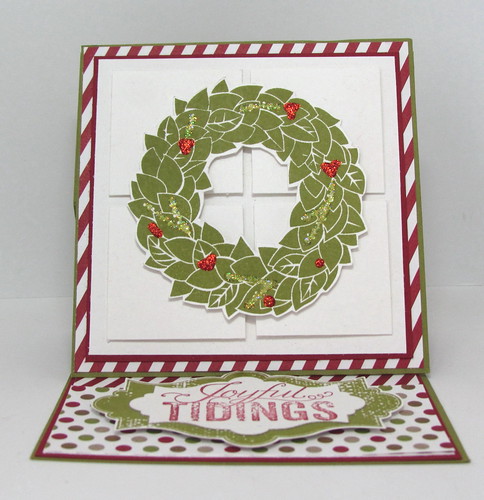
Joyous Tidings Wreath

Joyous Tidings Wreath by Andrea G71


 November Stamp Club Card

This card uses the Easel Technique.

Supplies:

Stamps:  Everything Eleanor, Wonderful Wreath, Christmas Messages
Paper:  Old Olive, Cherry Cobbler, Whisper White, DSP
Ink:  Old Olive, Cherry Cobbler
Accessories:  Dimensionals, Dazzling Details Glitter Glue (Cherry Cobbler and Silver)

Thanks for stopping by.

Andrea


Monday, November 4, 2013

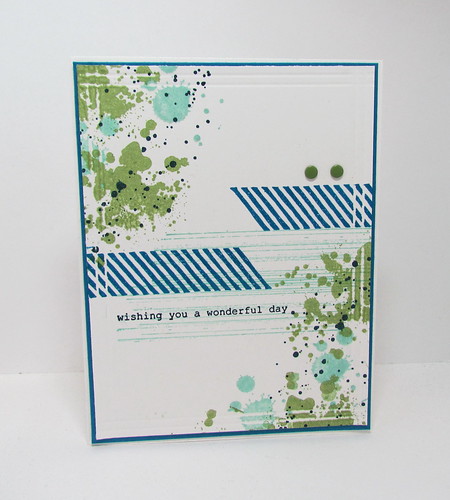
Gorgeous Grunge in Blue

Gorgeous Grunge in Blue by Andrea G71


 October Stamp Club card

A quick, easy and fun card to make. 

Note that two lines were scored on all four sides of the card.  Thought I would point that out since it could easily be missed.

Supplies:

Stamps:  Gorgeous Grunge, Bring on the Cake,
Paper:  Whisper White, Pacific Point
Ink:  Pacific Point, Wild Wasabi, Pool Party, Midnight Muse
Accessories:  Scoring Tool, Candy Dots (Subtles - Wild Wasabi)

I saw the below card on the My Creations Blog.  I had to CASE it.  For stamp club I just switched up the colours to make it more masculine.  
Thanks for stopping by.


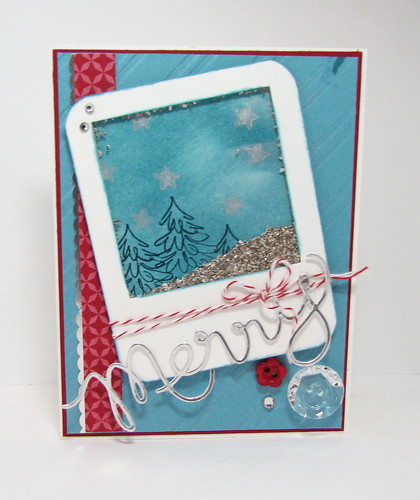
Everblue in Poloroid

Everblue in Poloroid by Andrea G71


October Stamp Club Card

I know it is only October but we have to get a few Christmas cards made at our stamp club workshop. This is our first Christmas card of the season.  We used two techniques:   The Shaker card and the Faux Letterpress techniques.  Unfortunately the photo does not show the Illuminate ink glittering in the stripes of the blue card stock (faux letterpress technique).  Here are the details on how to make this card.

Follow these techniques to make the poloroid shaker image and the striped background in Marina Mist:

Technique:  Shaker Card - Tutorial can be found on Splitcoaststampers
Technique: Faux Letterpress Tutorial can be found on Splitcoaststampers

 To create the picture image in the "poloroid photo", stamp the evergreen trees in Midnight Muse ink.  Sponge Marina Mist ink over the entire piece of card stock.  If you want, you can sponge a bit of Midnight Muse ink as well.  Stamp the stars using the Illuminate ink. Continue following the Shaker card instructions.

Tips:  

Use wax paper when using the expression thinlits.  This will make your life so much easier!!!  The sandwich works like this:  Bigshot Platform, Acrylic plate, thinlit, wax paper, card stock, Acrylic plate.  Works like a charm.  Thanks Brenda, I think you were the one that gave me this tip!
 
We tried Mica Flakes but they did not move around in our window very easily.  Too much static.  I think if you would want to use the flakes, double up on the mounting tape height to give the flakes more space to move.  The glitter is heavier and moves easily in the window.

To adhere the "merry", roll the glue dots to fit to the back of the sentiment. Rolling the glue dots keep them hidden.   Another option is to use spray adhesive. 

The Illuminate ink was used in the Faux Letterpress Technique.  


Supplies:

Stamps:  Evergreen
Paper:  Whisper White, Cherry Cobbler, Marina Mist, Season of Style DSP, Silver Foil Sheets
Ink:  Marina Mist, Midnight Muse, Illuminate, 
Accessories:  Scalloped Border Punch or Edgelit, Corner Rounder, Expressions Thinlets, Wax Paper, Cherry Cobbler Baker's Twine, Buttons, Rhinestones, Mounting Tape (Scotch brand - found in the framing section at Michael's), Silver Glass Glitter, Square Framelits, Sticky Strip, Transparency/Acetate, Glue Dots, Stylish Stripes Embossing Folder

If you have any questions regarding the making of this card, please don't hesitate to ask.  Thanks for stopping by.

Tuesday, September 24, 2013

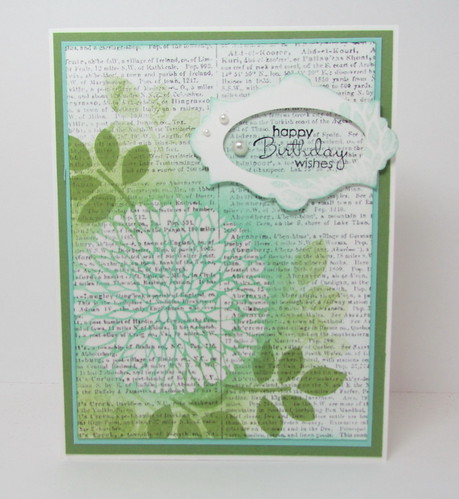
Use the Dictionary, Betsy


Use the Dictionary, Betsy by Andrea G71


 September Stamp Club Card

Emerging Colour Technique

Dimensions:


Whisper White:  5-1/2 x 8-1/2 card base, scrap, 5 x 3-3/4

Wild Wasabi:  4 x 5-1/4

Pool Party:  3-7/8 x 5-1/8


Supplies:


Stamps:  Betsy's Blossoms, Petite Pairs, Dictionary Background Stamp

Paper:  Whisper White, Wild Wasabi, Pool Party

Ink:  Basic Grey, Wild Wasabi, Pool Party, Black, VersaMark

Accessories:  Clear embossing powder, Pearls, Dimensionals, Oval Punch, Apothecary Accents Framelits, Sponge, Sponge Dauber


 Directions:

Ink up the Dictionary background stamp with Basic Grey ink.  Stamp off on scrap paper before stamping on the Whisper White card stock.

Ink blossom stamp with VersaMark ink and heat emboss with Clear embossing powder.  (Another option that looks nice is embissing the flower in white embossing powder. With using white EP, you will not see the word of the Dictionary stamp popping through the flower.

Once embossed, place a mask over the flower. I just punched out a circle rather than fussy cutting another stamped blossom.  Ink up the leaf stamp in Wild Wasabi. Stamp around the masked blossom up to three times without reinking in between.  Continue until you are happy with how it looks.

Lift off mask and use a sponge to randomly sponge Wild Wasabi and Pool Party ink in a circular motion.  The more ink you add and the harder you press, the darker it will show up on the card stock.

Punch out an oval on a scrap piece of Whisper White card stock.  Place the Apothecary Accent die over the oval (make sure the oval is centered) and run through the Big Shot. 

Ink the blossom stamp with Pool Party ink, stamp off and then stamp on part of the label. Sponge edges.

Stamp sentiment in Black ink. We found that the grey ink did not show up as well.

Use dimensionals to pop up the label and place over the sentiment.  Add pearls.

Voila! ! All done.

Here is the same card but with White Embossing Powder.


PS  My cards were inspired by THIS CARD on Splitcoaststampers.
Thanks for stopping by.


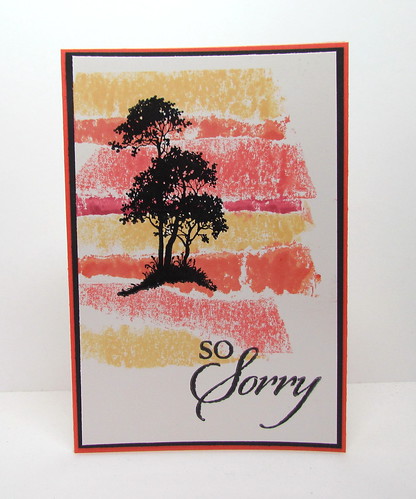
Serene Silhouettes

Serene Silhouettes by Andrea G71


September Stamp Club Card

Magical Masking Tape Technique

Supplies:  

Stamps:  Serene Silhouettes, So Sorry
Paper:  Whisper White, Calypso Coral, Basic Black, Glossy White
Ink:  Calypso Coral, So Saffron, Tangerine Tango, Primrose Petals, Black Stazon
Accessories:  Painter's Tape 

Dimensions:

Whisper White:  5-1/2 x 7-1/2 card base
Calypso Coral:  3-3/8 x 5-3/8
Basic Black:  3-1/4 x 5-1/4
Glossy White:  3-1/8 x 5-1/8 

Directions:

Follow the Magical Masking Tape Tutorial on Splitcoaststampers.  

For my card, once I had taken a piece of painter's tape, I then ripped it lengthwise.  After a piece was inked, I overlapped the straight edge of the tape over top another piece of tape.  That way I didn't have any straight edges showing except at the top of the card.  

If the strips of ink seem extra "inky", flip the card over and burnish the back of the card stock to get some of the excess ink onto your scrap paper.  

Set aside and let dry a little longer before stamping the image with Stazon ink.

That's all for now.  Thanks for stopping by.


Thursday, July 4, 2013

Everything Eleanor

Everything Eleanor by Andrea G71


June Stamp Club Card

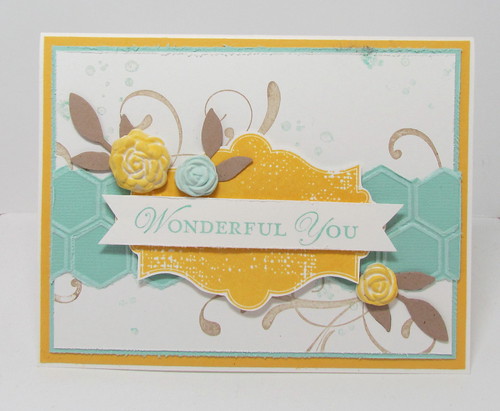
This is the second card we made at our stamp club workshop.  I found THIS CARD on Pinterest that I really liked and had to CASE it.  Just changed the colours and switched up some of the accessories.

I used Stampin' Up!'s new Pressed Clay and Mold.  Very fun to use.  I found that it takes about a day to dry.  After a significant amount of drying time, the flowers were firm enough to handle and not get deformed.  To make the Pool Party flower, I added a few drops of reinker into a plastic bag and squished it around with the clay.  Using plastic gloves might be a better way of doing this, but unfortunately I don't have any.  The yellow flowers were created by just sponging the molded flowers with Daffodil Delight ink.

Supplies:

Stamps:  Everything Eleanor, Loving Thoughts, French Foliage (retired)
Paper:  Whisper White, Daffodil Delight, Pool Party, Pool Party Coordinations, Crumb Cake
Ink:  Crumb Cake,  Pool Party, Daffodil Delight
Accessories:  Little Leaves Sizzlet, Edge Distresser, Honeycomb Embossing Folder, Sanding Block, Simply Pressed Clay, Blossoms Simply Pressed Mold, Dimensionals, Glue Dots

Thanks for stopping by.

Wonderful Wildflower Meadow

Wildflower Meadow by Andrea G71


June Stamp Club Card

I am sorry that you cannot see some of the details on the card.  The camera seems to have a hard time taking a picture of so much white plus the photographer isn't so skilled to figure out what can be done to correct it.  :(  What you cannot see is that the Wildflower Meadow background stamp was stamped in VersaMark and them embossed with Clear Embossing Powder.  The matching embossing folder was used to raise the stamped image.   Next, colour the one flower with markers, stamp again and cut out. 

I am not sure to whom I'm supposed to give credit for this card idea since you can find a bunch of designs like this one on Splitcoaststampers.

Supplies:

Stamps:  Wildflower Meadow
Paper:  Wisteria Wonder, Whisper White
Ink:  Garden Green and Wisteria Wonder Markers, Versamark
Accessories:  Clear Embossing Powder, Wisteria Wonder Ribbon, Dimensionals, Wildflower Meadow Embossing Folder, Edge Distresser

Thanks for stopping by.

Tuesday, June 4, 2013

Wildflower Meadow

Wildflower Meadow by Andrea G71

CAS(E) this Sketch #30

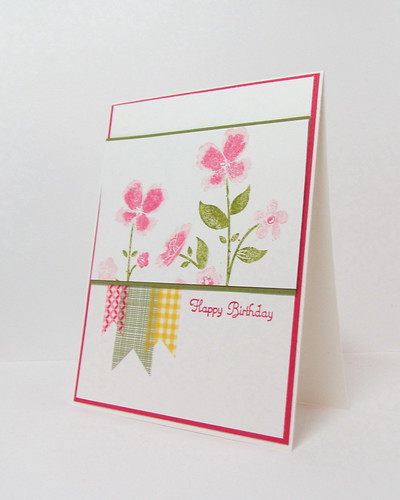
On the weekend I was able to find some time to stamp and pulled out the new Stampin' Up background stamp, Wildflower Meadow.  I also used the new DSP and washi tape (love that stuff).  I happened upon the Thursday sketch challenge (CAS(E) this Sketch) and was able to make two cards.  You can find the second card HERE or just scroll down.

For the main panel, I coloured the flowers with Pink Pirouette marker and then over top of that with the Melon Mambo marker leaving the edges pink.  I used the Old Olive marker for the stem and leaves.

You can find the sketch and more wonderful examples HERE.

Supplies:

Stamps:  Wildflower Meadow, Create a Cupcake (happy birthday)
Paper:  Gingham Garden DSP, Melon Mambo, Whisper White, Old Olive
Ink:  Melon Mambo, Melon Mambo, Old Olive and Pink Pirouette Markers
Accessories:  Gingham Garden Washi Tape

Thanks for stopping by.


My Friend

My Friend by Andrea G71


CAS(E) this Sketch #30

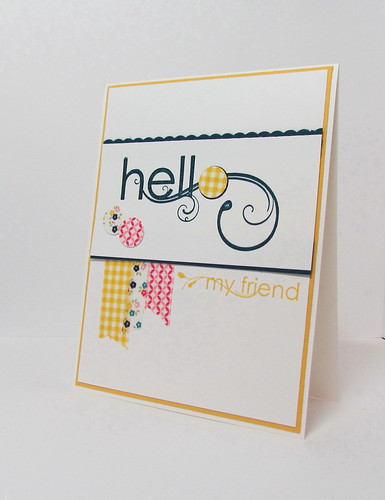
This is one of the cards I made using the sketch challenge found HERE.  The first card I made using this challenge can be found HERE.  Two completely different styles but of course I had to use the new washi tape again.

By the way, to make the circle embellishments, I just put a piece of washi tape down on Whisper White card stock and punched it out using the 1/2" circle punch.  The "flower" washi tape was too narrow, so I carefully taped two pieces side by side and then punched.

Supplies:  

Stamps:  My Friend
Paper:  Whisper White, Daffodil Delight, Midnight Muse
Ink:  Midnight Muse, Daffodil Delight
Accessories:  Gingham Garden Washi Tape, 1/2" Circle Punch

Thanks for stopping by.


Monday, May 27, 2013

Epic Herringbone

Epic Herringbone by Andrea G71

 May Stamp Club Card

Here is the final card we made at our stamp club workshop in May. The Herringbone Technique is a great way to use up any leftover strips of designer series paper you may have lying around.  I will definitely be trying this again in the near future.

You can find a tutorial for the Herringbone Technique on Splitcoaststampers.  

The instructions indicate that you need to use a Xyron to add adhesive to the card stock on which you will be adding your strips of paper.  I did not.  I used a regular tape runner but made sure I covered the entire piece of card stock with the adhesive.  No little parts of un-stickiness left uncovered.  :)

Supplies:

Stamps:  Word Play
Paper:  This and That Epic Day DSP, Whisper White, Early Espresso
Ink:  Baja Breeze, Garden Green and Early Espresso Markers, Sahara Sand
Accessories:  Label Framelits, Sponge Dauber, Dimesionals, Glue Dots, White Button, Brad, Gumball Green Ribbon

Thanks for stopping by.

Thursday, May 23, 2013

Artistic Etchings

Artistic Etchings by Andrea G71


May Stamp Club Card

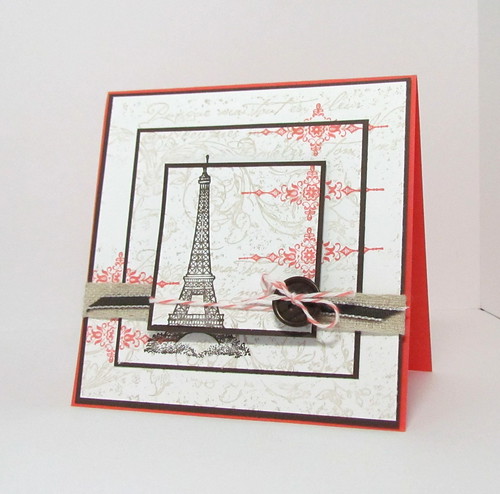
Triple Stamping Technique

You can find a great tutorial on the Triple Stamping Technique on Splitcoaststampers.  I followed these instructions using the Artistic Etchings stamp set and the Very Vintage Jumbo Wheel to make my card.  

Converting the Wheel to a Clear Mount Stamp

By the way, I don't actually use Very Vintage in it's "wheel form" anymore.  I have taken it off the wheel and use it as a background stamp.  Once again, Stampin' Pretty has a great tutorial on how to take your stamp off the wheel.  Just click HERE. 

Supplies:

Stamps:  Artistic Etchings, Very Vintage Jumbo Wheel
Paper:  Early Espress, Calypso Coral, Whisper White,
Ink:  Crumb Cake, Calypso Coral, Early Espresso
Accessories:  Natural Ribbon, Early Espresso 1/8" Ribbon, Calypso Coral Baker's Twine, Button, Glue Dots, Dimensionals

Thanks for stopping by.

Best of Everything

Best of Everything by Andrea G71


May Stamp Club Card

3 x 3 Card and Envelope

Envelope:  Using the Stampin' scoring tool and diagonal plate, score at 2- 1/4" at top and bottom corners.  Flip patterned paper 180 degrees and score again at both corners.  Fold to make envelope.  

I found a great template of various envelope sizes on the Stampin' Pretty blog.  Click HERE to download instructions. 

Supplies:

Stamps:  Best of Everything
Paper:  Floral District DSP, Whisper White, Old Olive, Tangerine Tango
Ink:  Old Olive and Tangerine Tango Markers, Early Espresso
Accessories:  Scoring Tool, Diagonal Plate 
Thanks for stopping by.
Tuesday, April 30, 2013

On the Diagonal

On the Diagonal by Andrea G71


April Stamp Club Card

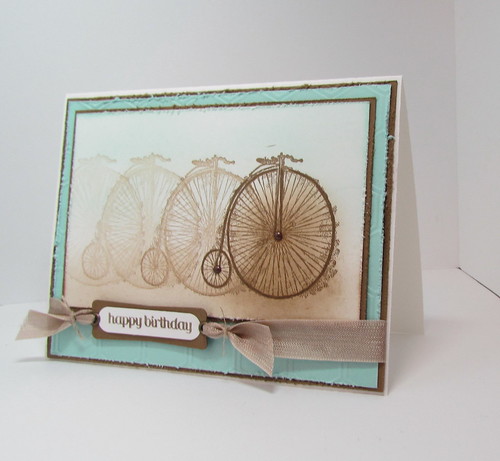
This month we made three cards at our stamp club workshop.  It was a very quick and easy card using the new photopolymer stamp set, Designer Typeset(see banner).  It works well with the latest trend of having strips of patterned paper on a diagonal.  One detail that is hard to see in the photo is that there are two scored diagonal lines underneath the "happy birthday".

Patterned paper strips are about 3/4" wide.  Tape them down to card stock, flip over and trip off over hanging edges.

 Supplies:

Stamps:  Designer Typeset, It's Your Birthday (retired)
Paper:  Sycamore Street DSP (SAB), Whisper White, Rich Razzleberry
Ink:  Rich Razzleberry, Basic Black
Accessories:  Scoring Tool, Scissors 

Thanks for stopping by.


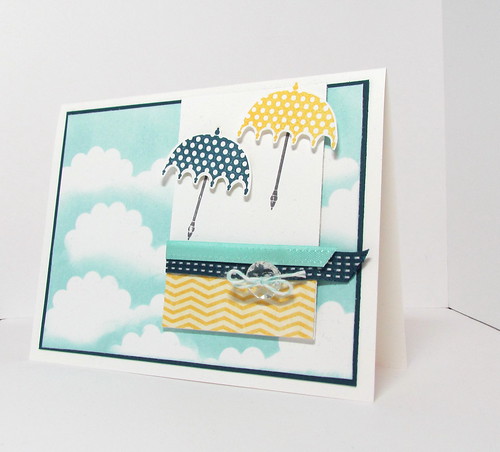
Rain or Shine

Rain or Shine by Andrea G71


April Stamp Club Card

Directions to make the cloud background:

Punch out four scalloped circles and trim off bottoms.  Tape together to resemble a grouping of clouds.  Place over white card stock and sponge area in a circular motion with Baja Breeze ink.

Supplies:

Stamps:  Rain or Shine
Paper:  Midnight Muse, Whisper White, Sunshine and Sprinkles DSP
Ink:  Baja Breeze, Daffodil Delight, Midnight Muse, Basic Gray
Accessories:  Scalloped Circle Punch, Midnight Muse Ribbon, Pool Party Ribbon (SAB), Vintage Faceted Designer Buttons, Pool Party Baker's Twine, Glue Dots, Dimensionals 

Thanks for stopping by.


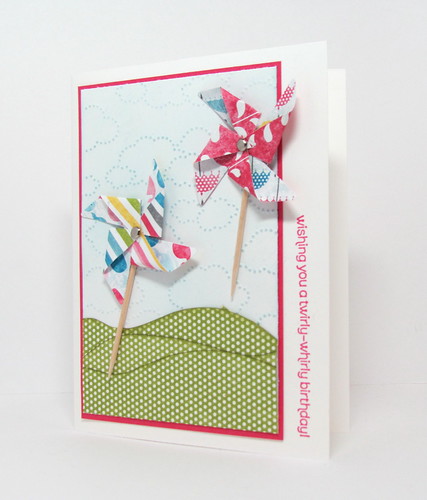
Whirly Twirly

Whirly Twirly by Andrea G71

April Stamp Club Card

Supplies:

Stamps:  Wishes Your Way
Paper:  Sunshine and Sprinkles DSP, Whisper White, Melon Mambo 
Ink:  Marina Mist, Melon Mambo, Old Olive
Accessories:  toothpicks, glue dots, scissors (to cut hills freehand), sponge dauber (to sponge edges of hills),  sponge (to sponge clouds), Cloudy Day embossing folder, silver brads, Pinwheel Die


Sunday, March 10, 2013

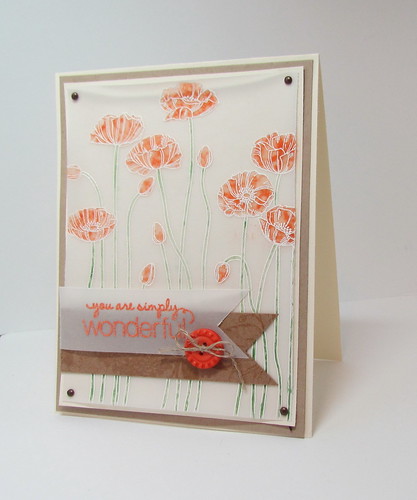
Pleasant Poppies on Vellum

Pleasant Poppies on Vellum by Andrea G71

March Stamp Card

I always like cards that have vellum on them.  It gives such a nice effect to the card.  I saw THIS card on one of my favourite blogs: Limedoodle.   I get so much inspiration from her blog.  Her cards are very clean and simple.  Anyway... I saw her card and this is what I came up with.

Just a few directions:

Stamp the Pleasant Poppies stamp set in Whisper White ink on the vellum card stock.  Add white embossing powder and heat carefully.  If you heat too much you might either burn the vellum or heat it too much and the vellum curls a bit.

Use markers to colour in the poppies.  

On this card, I spritzed the vellum lightly with water and quickly and carefully pressed a kleenex over top to take some of the water off.  Don't spray too much or the paper might curl.  This gives the poppies a more water coloured  or mottled effect.  Laying the the piece under some heavy books for a while will also help keep the vellum flatNote:  I did have left over supplies so I made some more of these cards.  This time I did not add water and as a result I didn't have to struggle with the curling vellum.  So I'm very sorry stamp club members, next time we won't add water to the vellum.  I also dabbed at the poppies with a kleenex soon after I coloured one to take some of the ink off.  That had a nice effect as well.

On the reverse side, place glue dots behind the poppies to help adhere the piece to the vanilla card stock.  Note:  If you place glue dots where there is not an image, the glue dots will be seen through the vellum.

Add brads to corners  and complete card.

The square punch was used to punch the flags on the vellum and DSP strip.  

Supplies:

Stamps:  Pleasant Poppies, Friendly Phrases
Paper:  Very Vanilla, Crumb Cake, Vellum card stock, Natural Composition Specialty DSP
Ink:  Whisper White, Versa Mark
Accessories:  Garden Green and Tangerine Tango Markers, White Embossing Powder, Tangerine Tango Embossing Powder, Square Punch, Button (SAB 2013), Linen Thread, Glue Dots, Mini Brads

Dimensions:

Very Vanilla: 11 x 4-1/4(card base), 3-7/8 x 5-1/8
Crumb Cake:  5-3/8 x 4-1/8
Vellum:  3-3/4 x 5, 1" strip
DSP:  1" strip  

Thanks for stopping by. 


Feeling Sentimental

Feeling Sentimental by Andrea G71

March Stamp Club Card

In January I was looking for some card ideas for my Dad's birthday.  I came across THIS on Splitcoaststampers card and absolutely loved it.  Plus I pretty much all the supplies which is a bonus.  Michelle Zindorf has a great blog with very detailed tutorials.  I basically followed her tutorial on making the main image of the the card.  So rather then rewriting the instructions, you can check it out for yourself. The card I made for my dad was about 6" x 4-1/2" whereas the card shown above is a regular A2 size:  4-1/4 x 5-1/2.

Supplies: 

Stamps:  Feeling Sentimental (SAB 2013), Itty Bitty Banners (sentiment)
Paper:  Whisper White, Soft Suede, Pool Party
Ink:  Soft Suede, Pool Party,
Accessories:  Soft Suede Marker, Mini Brads, Honeycomb Embossing Folder, Word Window Punch (retired), Label Punch, Eyelets, 1/8" Circle Punch, Crop-o-dile, Crumb Cake Seam Binding, Linen Thread, Edge Distresser, Sponge, Dimensionals

Dimensions:

Whisper White8-1/2 x 5-1/2 (card base), 3 x 4-3/4 (main image), scrap
Soft Suede:  4-1/8 x 5-3/8, 3-1/8 x 4-5/8, scrap
Pool Party:  4 x 5-1/4  

This is the card I made for my dad.  Pretty much the same Just bigger and there is antique hardware highlighting the sentiment.
  

Thanks for stopping by.
Thursday, February 21, 2013

Hey Chickie

Hey Chickie by Andrea G71
Retro Sketch # 51

A couple of weeks ago I ordered some stamps from a company called Paper Smooches.  Shhhh.   They are not Stampin' Up!  Don't tell.  :)  I have been eyeing these stamps for a while now.  They are just sooo cute!  I just love the talk bubble.  Anyway....  I saw THIS card posted on the Retrosketch blog and had to case it using my new stamps.

I made my own homemade light box.  So I'm hoping that will get rid of the blue-ish tinge I seem to have in the last number of photos.  Cross your fingers.

Supplies:

Stamps:  Chubby Chums, He Said She Said (both Paper  Smooches)
Paper:  Whisper White, Tangerine Tango, Wild Wasabi
Ink:  Black Stazon, Cloudy Day Embossing Folder, White Baker's Twine, Yellow Button (unknown), Glue dots, Dimensionals  

Thanks for looking.


Thursday, February 14, 2013

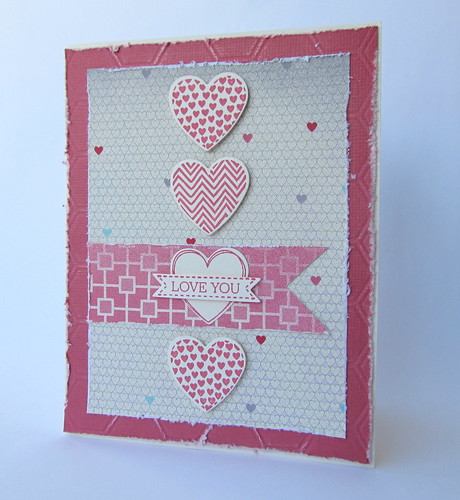
Love You

Love You by Andrea G71


Happy Valentine's Day!!  And a happy birthday to my friend, Jen.

Supplies: 

Stamps:  Hearts a Flutter, Itty Bitty Banners
Paper:  Very Vanilla, Primrose Petals Co'ordinations, More Amore Specialty DSP
Ink:  Primrose Petals 
Accessories:  Framelits:  Hearts a Flutter & Itty Bitty Banners, Edge Distresser, Sanding Block

Have a wonderful day!  

Wednesday, February 13, 2013

Wonderful You

Wonderful You by Andrea G71

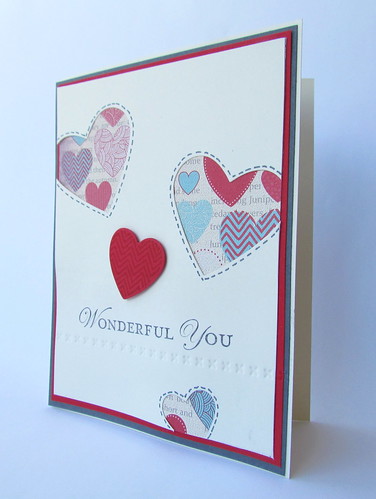
I have seen this card layout a number of times on either Splitcoaststampers or other blogs.  It's a good one.

Supplies:

Stamps:  Loving Thoughts, Hearts a Flutter
Paper: Very Vanilla, Basic Grey, Real Red, More Amore Specialty DSP
Ink:  Basic Grey
Accessories:  Basic Grey Marker,  Hearts a Flutter Framelit, Needlepoint Border Embossing Border, Hearts Framelits, Dimensionals

Thanks for stopping by.